What Is Blender?
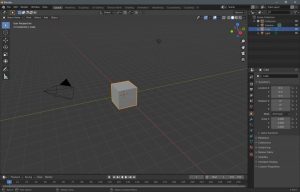
First off, let’s address exactly what Blender is. Blender is a free, open-source modeling and animation platform with a focus on creating visual effects and art. Version 1.00 was released in January 1995 before going free in 1998. In 2002 the Blender Foundation was created with the goal of continuing development of Blender as an open-source project. Blender can be used for the entire content creation pipeline: modeling of 3D assets, material and texture creation, motion tracking, animation, compositing, and video editing. In this series, we will cover a different part of Blender every week with the goal of being able to create a full animation by the end of the series. Blender can have a rather steep initial learning curve, so reading the documentation may be helpful if and when you get stuck. This week we will focus on initial setup and basic knowledge.

Downloading Blender
Blender can be found here, on the Blender Foundation website. For our purposes we will be using version 2.93.4. If using Windows, select the option “Installer.” For MacOS, select the option corresponding to your processor (Intel or Apple Silicon). Blender can also be downloaded from Steam. At a minimum, you will need a computer running Windows 8.1, MacOS X 10.12, or a version of Linux comparable to Ubuntu 16.04. I recommend having 8 gigabytes of RAM paired with at least an Intel Core i5 5th gen or AMD Ryzen series processor. Core 2 duos, Athlons, and FX-series processors are not recommended. While a GPU is certainly nice to have and will greatly decrease render times and increase viewport responsiveness, it is by no means necessary. I will mainly be using a PC running Windows 10 with 32 gigabytes of RAM, a Ryzen 7 3700x, and an RTX 3070 Ti. After downloading, run the .msi file to install.
Initial Setup
After Blender has been installed, run it and navigate to the Preferences popup (Edit -> Preferences). The first thing that we will do is navigate to the “System” page, and under “Cycles Render Devices,” check every available item under CUDA, Optix, and OpenCl. Not everyone will have options available here, so don’t worry if you have a message telling you there were no compatible GPUs found. If you have a large amount of RAM, you can increase the “Undo Steps” under “Memory and Limits” as well as set the “Undo Memory Limit” to 0 (in Blender, 0 actually means unlimited). In the “Save and Load” section, ensure that autosave is enabled. In the “File Output” section you can change the file paths for various inputs and outputs to suit your preferences. In the “Add-ons” section search for the Node Wrangler addon and enable it. This is a suite of third party tools used for material and geometry nodes later on down the line. Another useful addon is the Rigify addon, which makes rigging models for animation easier. Something that I find makes Blender easier to use is enabling the “Zoom to Mouse” option under Navigation.
Final Notes
Now that we have Blender basically set up, we are ready to begin on our first render. Next time we will cover our first render, including modeling, material, and rendering basics. Feel free to play around until then, and change settings to your preferences.
