I have spent a lot of time recently on designing and realizing two characters for my amateur portfolio. As a bonus, just to prove that anyone can do it, I only used software that is either open source or free to students, so if you are interested in 3d design and want to make something you can be proud of, don’t let your budget stop you. The only real cash injection involved is getting a good computer. This article really isn’t about how to build a good computer, but if you need help finding the right build you should check out Tom’s Hardware and Newegg.
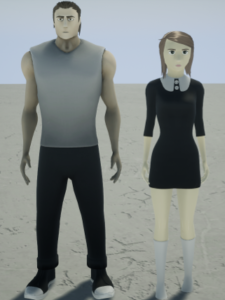
Anyway, before I begin to create a digital character, I need to conceptualize it. I went through a phase of sketching out my ideas and looking at how other artists designed similar characters. Out of my male and female models, I will be focusing and showcasing the latter, but if you wanna see my super buff guy (he doesn’t skip reps) just scroll down the page. Anyway, this is what some of my concept sketches for the female character look like:
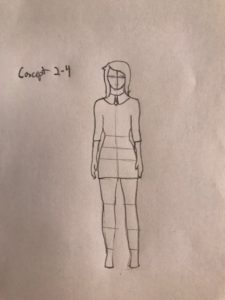
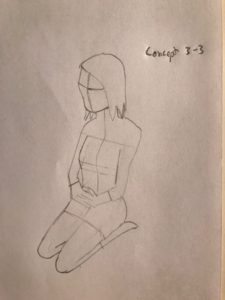
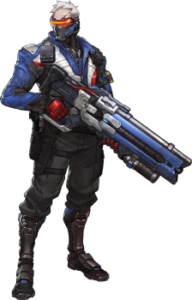
As you can see, I am trying to keep her design very simple. If you look at the character designs from professional artists, take Soldier:76 for instance (below), you will notice he has a very recognizable silhouette. Between his gun, his pointed shoulders, and spiky hair, 76 has a very recognizable silhouette, which helps a viewer recognize him and make split-second decisions in game. I’m trying to create a likable character with a very identifiable silhouette, particularly through a purposely-cartoony-slender waist, a simple hairstyle, and a short black dress(Not all characters have good silhouettes btw. Look up Knack). The reasoning for the dress is I want to animate it solely based off of her legs, i.e., I want to calculate the shape of her dress based only off of the angle between her two thighs. A longer dress would make this impossible, as I can no longer make it move convincingly during a walk cycle without animating it separately.
A bit of terminology and explanation: A mesh is a representation of a 3d shape. Humanity will never be able to model a sphere, but rather, a mesh that closely represents a sphere. This is because meshes rely on lines to be rendered. Every mesh is composed of vertices, which have a finite position in 3d space, edges, and flat faces. Vertices are connected by edges, which are connected by faces.
After I made the basic concept, I dove into the modeling phase, with open source software Blender. When you model something complicated, like a character, it helps to have your concept photos as a reference(Artists generally use a front, side, and top view, each representing one dimension to model). After the images have been imported, an artist can begin “blocking in” the model, getting the basic shape but unrefined surfaces. At this time, details like eyes and a mouth have yet to be added. I just make the basic shape of her legs, dress, arms, and head. Next, an artist adds detail to the shape by smoothing out rough edges and trying to capture smaller and smaller parts of the model that give it character, such as my model’s childlike tiptoes and slender waist (I want to make her stand on her tiptoes to give her a unique walk cycle, and make her look generally lovely and innocent). There are always some tough parts, such as hands and the face, but with time and sandwiches (I prefer Dave’s Killer Bread), it can be done.
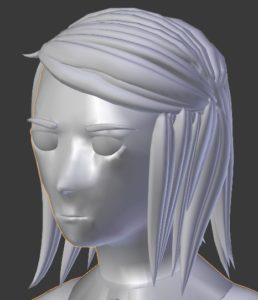
Next comes hair. I am not going for a photo-realistic look, as can be seen from my character design, so I will not be making every strand of hair. Instead, I use distinct shapes of every lock of hair, as seen here:
I walk a difficult line between cartoony and lazy, but with this method, I manage to make it look more cartoony. After a lot of refining and deleting parts of the hair that a viewer would never see to optimize the model, the hair is finished.
At this point, I need to go through the entire model and clean it up. I get rid of unnecessary faces of the model that don’t matter very much, again, to optimize it, allowing it to load and render quickly, and prepare it for the next major step, texturing, where I will designate her coloring, so that when it is rendered(Drawn by the computer when lighting and shading are taken into account) it isn’t just blank. To do this though, I need to unwrap the model, as an image is two-dimensional and the model is not. Think of wrapping up a Christmas present: the wrapping is practically two-dimensional but the present is three-dimensional, so you fold and cut the wrapping to cover the present. Unwrapping is just the opposite of that. Every part of the model gets its own area on what will become her diffuse texture or coloring. This is what I’ve got so far:
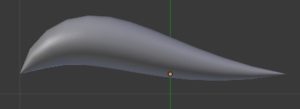
After I finish a clean unwrap, it’s time for texturing (I use Gimp for this). In order to save on processing, I will account in her diffuse texture for ambient lighting, which is lighting that can easily and generically be estimated, so that, in most any environment, it is constant. That way, instead of calculating that the part of her cheek almost covered by her hair will be darker than her completely exposed kneecaps for every frame of an animation or game, I can just check her diffuse texture. Fortunately, Blender has a feature for accurately calculating ambient lighting, called baking. I can easily bake the ambient occlusion of my model:
As you can see, convex parts of the model, where ambient light would have a tough time reaching, are darker, while concave parts of the model, where ambient light would have an easy time reaching, are light.
I will also designate her skin, dress, collar, socks, and eyes to be a different color, and bake that into a texture. She’s supposed to be Slavic or something so I made her skin pretty light.
Additionally, I have generated a vertical gradient from her head getting darker to her toes that will darken only her clothes(I used handplane for this), just to make her look more aesthetically appealing.
The last texture I will bake is a curvature texture. The more curved the model is, the brighter this texture will be, so her cheekbones and fingertips have a little bit of a brighter tone then flat parts of the torso. This aim of this texture is just to provide visual interest to the model while still staying to my original goal of keeping it simple.
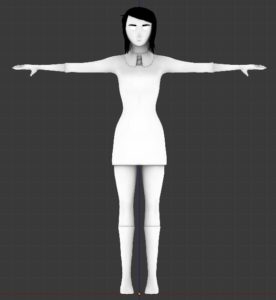
After I have made those four textures, I combine them into a composite texture, which will be the final texture designating her coloring. So far, this is what I’ve got: (Hair is black because its material is entirely separate from the rest of the mesh due to fundamental differences in rendering.)
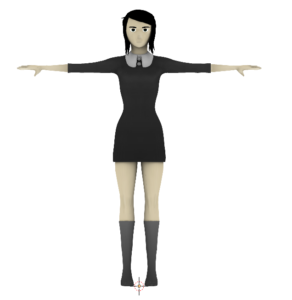
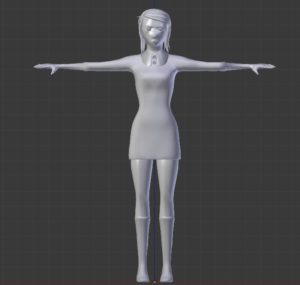
If you noticed, every shot of the model is taken in a T pose, where the arms are stretched at 90-degree angles to the body. As uncomfortable as this looks, it’s a necessary evil, because I need to model her that way so that when animated her arms have a wide range of motion. Before I can do that though, I need to rig the model.
Essentially, rigging a model is like adding a skeleton to an animal. Animating a model without a rig is about as hard as trying to walk without your skeleton.(You’d have to animate every vertex for every keyframe, or moment when you record the position, rotation, and scale of something) The rig is just a set of bones in a hierarchy, so that when the humerus moves the forearm moves with it, but not the other way around. Each bone has control over different parts of the model, so for the most part, this model’s rigging will look a lot like the human skeleton, save for the face, which has a bone for every major muscle group. After I create the rig, I have to designate where and how much “weight” or influence each bone has over the model. Places like kneecaps have a bit of overlap, where the thigh bone and the ankle bone both have near half weight. It must be perfectly interpolated so that the weight of every vertex of the model must total 1, or total influence. This process is called “skinning” or “weight painting”.
Now that the mesh has a meaningful skeleton, it can be animated. This is where I start to get frustrated. Animation is much harder than I thought and will take a time commitment I wasn’t expecting. Even making a robotic, inhuman walk cycle for this chick took me about an hour and a half. If three dimensions are hard to work with, adding time as another axis makes animation very painful. As for now, I hope you learned something from my guide. If you are interested in concept art, modeling, texturing, rigging, or animation, let me know because, as far as I know, I’m the only loser willing to sacrifice a social life for digital people.